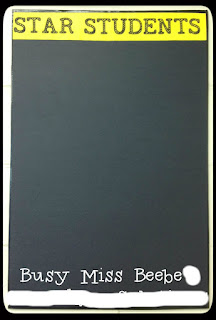
As I was packing up my classroom last June, I found foam board that the teacher who had the classroom previous to me had ordered and left behind. I wondered what I could possibly do with so much foam board, and then I thought about the possibilities of creating my very own bulletin boards. Push pins and thumb tacks fit in the foam board perfectly, and so I was ready to start this project for the next school year. (The foam board that I have is 20" wide, 30" long, and 3/16" deep.)
Initially I wanted to have two, but I couldn't think of any way to actually use them. Long story short, I decided on having just one (for now) to display exemplary student work. I measured paper to cover the board, and hot glued the paper to the foam board. Last, I added duck tape to protect the edges. At first I tried using blue tack/sticky putty (whatever you want to call it), but the board was too heavy for it to hold. (This foiled my initial plans of creating several bulletin boards to switch out periodically.) So I had to use the permanent foam tape. (The custodians are going to LOVE me when I ask them to paint the room in a few years.)
So here is the finished bulletin board.
I used our school colors for the board, and named it the "Star Students" board in reference to our school's celestial theme.
Next I implemented an idea I've seen floating around on Pinterest. I hot glued thumb tacks onto clothespins. This will allow me to easily hang student work without damaging it. (Because I'm the type of person that if someone hands me back my work and there's holes all over, I get annoyed.) Then I covered the clothespins with Washi tape that I have for SMASH books.
So here is my proud achievement for today, all set and ready for student work.


No comments:
Post a Comment