Showing posts with label Classroom Decor. Show all posts

Saturday, September 30, 2017

My Classroom Tour #SundayFunday

This week's #SundayFunday prompt is to do a classroom tour. 
 
I love classroom tours!  I made mine as a video at the beginning of this school year, and so far nothing has really changed.

Submitted for your viewing pleasure, my classroom tour:

Wednesday, August 3, 2016

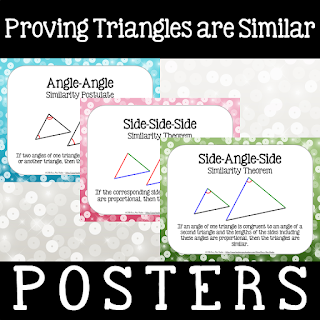
Triangles Posters [#MTBoSBlaugust]

My first year teaching I made so many posters.  By hand.  On construction paper.
Needless to say those are not my favorite.  And they are super faded.  Actually, they only exist in the past tense now.  I threw those away at the end of the year, and made new fancy posters.  Today I'm sharing my triangle posters.

I made posters for the 5 congruent triangle postulates/theorems:
https://www.teacherspayteachers.com/Product/Congruent-Triangle-Posters-2618060

I also made posters for the 3 similar triangles postulates/theorems:
https://www.teacherspayteachers.com/Product/Similar-Triangle-Posters-2695556


The posters are available in my Teachers Pay Teachers store.  The congruent triangle posters are here, and the similar triangle posters are here.

Don't worry.  More posters are on the horizon.

Friday, August 14, 2015

Geometry Standard Posters

I'm always looking for new and better ways to organize and to cut down on all of the little things I have to do that seem so inconsequential.  Our district requires us to post our objectives and standards every day.  Since the standards do not change (for now), it just makes sense to have a set pre-printed to post on my board.

I've resisted this for so long because I know that not all students will be able to see the standards from where they sit in the room.  (In fact, I probably won't be able to see the standards from where I (sometimes get to) sit.)  I finally decided to not let that hold me back for two reasons:  (1)  I am so certain that my students don't even look at the board anyway.  (2)  I keep all of the supplies for the day on a table under the board, so students can see the standard when they walk in, even if they sit far from the board.

Since I was not a fan of the standards poster sets available on TPT, I made my own.

https://www.teacherspayteachers.com/Product/Common-Core-High-School-Geometry-Standard-Posters-2032021

Tuesday, August 12, 2014

New Assignment Board


Last year I shared how I organized my homework board.  Before summer vacation began, I re-aligned the tape on the board.  Some of it was peeling off and I was never totally happy with how it came out originally.  This time I measured everything. ;)  I also added more space for announcements.


The big change was on my second marker board.  Previously I just hung signs for objectives for my two classes.  (My Contemporary Math class does not get homework.)  I added spaces for common core learning standards.  I also added a space for announcements for my Contemporary Math class. 

Sunday, August 10, 2014

How the Year Ended - Mini-Classroom Tour

At the end of last school year (2012-2013), I posted some pictures of how my classroom looked, but I had already taken down all of the glorious posters I usually have on my classroom walls.  So here are my classroom photos from the end of the past school year (before I made any changes). 

Before the end of school year, I was informed that my classroom (among others) would be in use over the summer while asbestos is being abated in our elementary school.  While this may seem as a huge disadvantage, I made the most of it.  We selected new textbooks for next year and part of the process is getting rid of all of the old textbooks.  I decided to seize the opportunity and also rid myself of all of the really old textbooks I had in my classroom.  (I mean from Math A/B, Sequence 1/2/3, and even earlier.)  Doing so cleared up so much of my cabinet space.

In the cabinet directly behind my desk (the one that housed a mouse last year), I put all of my teacher supplies (with large heavy items covering any holes that a mouse could visit through).  I LOVE the photo boxes from Michael's.  They're usually on sale for $2 each, sometimes even $1.66 each.  They have a space for labels and they hold so much. Best of all, they make everything look neater.

In the cabinet to the immediate left of that, I have all of the supplies that I routinely use with my students.  The other three cabinets are a somewhat organized mess, but these two cabinets were absolutely beautiful.

However, these cabinets do not look like this today.  Due to our visitors, I had to lock up everything from inside my desk, and anything that I normally leave on a work surface.  Also, I have been going back to school to print out the updated Geometry modules and to review with students for the August exams.  While there, I noticed that many supplies for next year had already been dropped off, and I put them away to get them out of the teacher's way.  I cannot wait to go back to the glorious organization that I had before September.

Tuesday, July 8, 2014

New & Improved Student Resource Center

Between the last day of class and the Regents exam I had two days of downtime.  I decided to take advantage of the opportunity to start cleaning things out and organizing for the new year.  While doing so I had an idea to improve my student resource center.

Before:


Throughout the year I noticed a few issues with my system.  Firstly, the folders for absent work are great, but they're not all visible to students, and when they are full of papers, the folders flop over.  Secondly, I had the trays organized with papers that students routinely need, but they had a hard time finding them.  Lastly, the folder organization system I had was not visible enough to students in the corner.

The first thing I changed was getting rid of the trays.  I needed a way to label the three sections so that students could find what they were looking for.  My solution was to purchase another set of Sterilite drawers for paper.  I labeled each drawer so that students could easily find the paper they are looking for.

The next thing I did was create a new DIY Bulletin Board.  I wanted to display all three folders at the same time.  I also wanted to get rid of the dry erase calendar, and display the procedure for completing absent work in a neater presentation.  I thought the best way to do all of these at once was on a new bulletin board.

I covered the board in construction paper and wrapped the edges with Duckings Duck Tape.  I used permanent foam tape to secure the folders to the board.  (I wish I could simply use some push pins, but my students will take them from the board, rearrange them, etc.  It's not worth the headache for me.)

I had to cut down the paper used to the absent work procedure and the calendar.  The procedure is laminated.  The calendar needs to be switched every month, so I attached a sheet protector the bulletin board using more permanent foam tape.  (I use the calendar to write down all of the homework assignments for the month so students know what homework assignment they are missing.)The sheet protector had to be folded to fit the slightly smaller paper, but the sheet protect did not agree with this.  I found a thin piece of cardboard to place behind the calendar page that helped to flatten out the sheet protector. 

To finish the board I added an Absent Work banner at the top of the bulletin board and fixed it to the wall.  I am very happy with the finished results.  I just hope that they don't change my schedule because then I will have to make some changes to the board.

The last thing I did was move the folder organization for extra papers to the front of the cabinet.

After:

I already love the changes.  My students liked them too.  When they came in the next day for review.  I got the ever popular question, "Why didn't you do that for us?" 

Sunday, September 8, 2013

My Classroom August 2012 - September 2013

August 2012
When I was first assigned my classroom, I had so much clean up to do!  I've heard stories about new teachers coming in and not having anything to work with.  I had the exact opposite problem.  I had too much to work with.  I've had to do so much purging.  And honestly, I could easily still do a lot more.  (I have a ton of books that weren't even written this century.  I'm debating if I should donate them elsewhere or just toss them.) 

What I love about my classroom is that it is huge, there are several cabinets, tons of counter space, and built-in book shelves.


 September 2012
I just wanted to include this photo of triumph.  Notice something different from the photos above?  My projector broke right before the first day of school.  I had to turn all of the desks to the left and teach on the marker board.  This lasted a few days.  Even though they had a new projector ready for me, we had to wait for the guy to come in and install it.  I was so excited when I finally got my projector up and running!

June 2013 
This is what my classroom looked like when I left it for the summer.  I wish I had started taking pictures before I took down all of the posters.   I leave no available space on the walls.  I was very excited about this one little change.  I had two filing cabinets behind the door.  One three drawer and one five drawer.  The five drawer was filled with union stuff (from the 70s and 80s) because the previous classroom teacher is a past president.  Another teacher needed a five drawer filing cabinet, and since I wasn't using it or planning to use it, I let her take it.  After we emptied it out, I told her that I was thinking of moving the large cabinet to the corner behind the door.  She helped me and we moved it right then and there.  Now I have this beautiful space to hang even more posters.  (It also freed up space to huddle for all of our upcoming emergency drills.)

September 2013
Here is my classroom set up for this school year.
View from the door:
 My wall of windows with cabinets and book shelves underneath:
I'm going to start referring to this corner as my student resource center.  It has a calendar of homework assignments, absent work, test corrections forms, loose-leaf paper, scrap paper, extra hand outs, my after school schedule, and of course, a bunch of inspirational quotes.
My wall with whiteboards- one for homework assignments, one for class objectives, and one blank one (My students like to fill that one in with a quote of the day or SAT problem of the day.):
View from my desk (I have my desk set up in rows right now.  I did finally find a way to group the desks into tables, and I'm going to experiment with that this year.):
The front of my room - SMART Board, student recognition board, chalk board, etc.:
My bulletin board wall with the beginning of my vocabulary wall for Geometry, and four brand new student computers:
That is how my classroom looks right now.  I will post about updates as I make them. 
Wednesday, August 21, 2013

DIY Bulletin Board

As I've mentioned in a previous post, I only have one bulletin board in my classroom.  Last year this did not stop me from using every bit of available wall space to hang posters.  However, I would love to have additional bulletin board space.

As I was packing up my classroom last June, I found foam board that the teacher who had the classroom previous to me had ordered and left behind.  I wondered what I could possibly do with so much foam board, and then I thought about the possibilities of creating my very own bulletin boards.  Push pins and thumb tacks fit in the foam board perfectly, and so I was ready to start this project for the next school year.  (The foam board that I have is 20" wide, 30" long, and 3/16" deep.)

Initially I wanted to have two, but I couldn't think of any way to actually use them.  Long story short, I decided on having just one (for now) to display exemplary student work.  I measured paper to cover the board, and hot glued the paper to the foam board.  Last, I added duck tape to protect the edges.  At first I tried using blue tack/sticky putty (whatever you want to call it), but the board was too heavy for it to hold.  (This foiled my initial plans of creating several bulletin boards to switch out periodically.)  So I had to use the permanent foam tape.  (The custodians are going to LOVE me when I ask them to paint the room in a few years.)

So here is the finished bulletin board.
 I used our school colors for the board, and named it the "Star Students" board in reference to our school's celestial theme.

Next I implemented an idea I've seen floating around on Pinterest.  I hot glued thumb tacks onto clothespins.  This will allow me to easily hang student work without damaging it.   (Because I'm the type of person that if someone hands me back my work and there's holes all over, I get annoyed.)  Then I covered the clothespins with Washi tape that I have for SMASH books.  
So here is my proud achievement for today, all set and ready for student work.


Sunday, August 18, 2013

Geometry Timeline

This was an idea I had from when I student taught.  When you review a topic that your previously covered, or when you need to build upon a topic that you previously taught, kids always seem to have a way to be completely dumbfounded.  Then you hear it, "We never learned this!"  I knew that when I started teaching, I wanted to keep track of the things we learned and display it for the students.

This year I set up a Geometry Timeline on my only bulletin board in the classroom.  I kept track of each unit, and the posted the vocabulary and postulates/theorems we learned.  Here is what it looked like:

So here's my reflection:  I did not keep up with it after the seventh unit.  (We had 12 total.)  Which is just as well, because I was clearly about to run out of space.  It became one more thing I had to do, and I was already overwhelmed (you know, first year and all).  There was also so much to include.  I had to use a small font, and it could not be read from across the room.  If I try this again, I am going to simplify it.  This is really not representative of the original idea I had; I think I would want to go with something closer to that if I were to do it again.  I might try this sometime in the future, but this year, I want to do a vocabulary wall to archive our vocabulary words for the year.

My other project is to create more bulletin boards in my classroom.  I hate only having one.  The teacher that had the room before me ordered a ton of foam boards, so I want to use those to somehow create more bulletin boards.  Stay tuned for how that project turns out.

Thursday, August 15, 2013

Math Banner Freebie!

I absolutely loved the banner Tiffany from The Learning Effect designed here.  The best part is that I have a window just like hers to showcase such a beautiful banner.  Unfortunately, it wasn't something I could use for high school.  (See what I'm saying with this whole elementary "vs." secondary thing?)  So of course, I just had to make my own.  I designed the banner to say "Welcome to Math" (because Geometry would not fit and I didn't want to exclude my Contemporary Math kids).

Each triangle measures 7.5" wide.  My window is only 32" wide, so I had to hang my banner by overlapping each triangle by about 3".  I printed, laminated, and cut out each triangle.  Then I hung each triangle individually with Scotch Mounting Squares.  (I used temporary ones to keep everyone happy, and they work very well.)

Here is the end result:
Here is your free copy of the math banner.

Sunday, August 4, 2013

New Folder Organization

I have a whole system set up for students to pick up the work that they miss when they're absent.  This is not what im talking anout here. Toward the end of the year, I was no longer able to assign homework from the textbook, so I had to assign worksheets.  The thing about worksheets is that about one third of them mysteriously disappear once students walk out the door.  So I had to make extras.  Lots of extras.

The other thing about worksheets is that students will ask for the ones that their missing at the worst times.  (Like immediately after I've filed them because it seemed that no one else needed them.)  This was my solution.
It worked.  Students had access to the worksheet they were missing, and I did not have to go out of my way to find them.  For this year though, I wanted to streamline my folders.  Literally.  Have you seen these?  I found some at Wal-Mart and their price range was $9.99 and up, and had more pockets than I needed, so I decided to make my own. 

This is what I came up with.
I made new signs for each day of the week and glued them onto a manilla folder.  I also decided to cut the tabs off of each folder.  I used some cute new duck tape (a smaller version called "Duckling").  I first taped each folder shut on the right and left sides.  Then I taped one folder to another on the right and left sides again.  I taped it so that the folders are inside of each other (so I don't accidentally insert papers between the folders).  Finally, I taped a border on each side to keep it sturdy.  I also added a tape border to the top and bottom to make it look "complete".

The only drawback is that once papers are inserted into the folders, they will cover the labels.  That's okay, though.  I think by high school kids understand the sequence of the days of the week.

The only thing I would actually change is that I set the digital paper to 50% transparency.  I should have left it at 100% because now the colors look washed out.  But oh well.  I wasn't about to waste supplies.

Want to make your own?  (The transparency is set to 100% for bright, vibrant colors.)

Sunday, July 28, 2013

My Homework Board

This year I am thrilled to get started on setting up my classroom for a new year.  Last year I had less than a week to clean out the room from the previous inhabitant, and get it ready for the year.  I'll have a before and after and after again post in the next few weeks.  There were so many things that I had to set up as I go.

My favorite thing that I've implemented was my homework board.  I have one wall with marker boards, and another wall with chalk boards.  These two walls are perpendicular to each other.  Unfortunately, my SMART board is fixed to the wall that my chalk board is on.  Determined to not let the marker boards go to waste, and to free my chalk board space, I've made the marker board closest to the front of the room my homework board.

I keep all homework assignments from the week up until the end of the day Friday.  I also had a section of announcements.  I very quickly tired of having to draw lines all over my board to designate space for each day of the week and then find space for announcements, so I organized it.  I printed out labels for each day of the week, a label for announcements, and a label for the objective (not pictured).  I laminated and then taped these on the board, and separated the sections using blue painter's tape.  I know that I could have easily found cuter alternatives (can you believe all the cute patterns that are now available in duck tape?), but I did not want to ruin the surface of the board.

 Here is the final product:

Thank you!

Thank you for being patient as I got my new blog set up.  I am slowly releasing updated versions of old posts while I add new content.  Plea...